I recently completed this conversion, installing both S-CAB radio control and adding BPS battery power supply. In HO scale, the engine compartment inside width of 3/4" complicates the project and requires a non-standard battery.
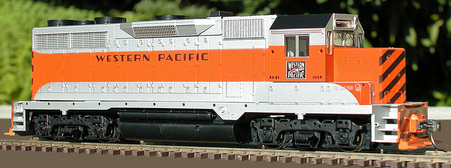
The model (photographed here without handrails and other trim) was manufactured by Kato and is quite "friendly" from an assembly perspective.
The model (photographed here without handrails and other trim) was manufactured by Kato and is quite "friendly" from an assembly perspective.
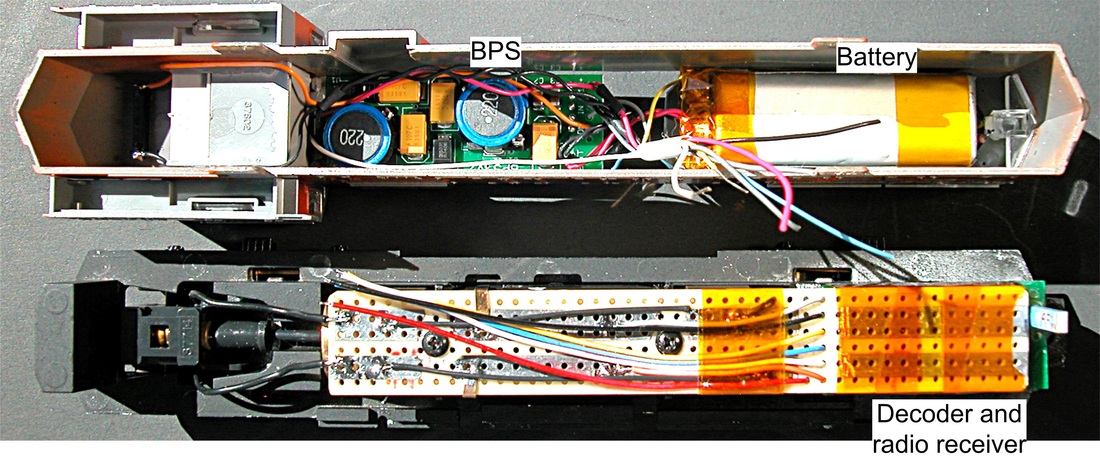
The motor sits fairly low on the chassis, leaving useful space above the motor for battery and BPS. The dynamic braking hood is removable and I used this to make wiring more accessible. Decoder and radio receiver are mounted using a piece of circuit board attached to the motor bracket. The radio antenna is mounted vertically.
Since this arrangement requires 7 wires connecting the chassis to roof-mounted components, I added a socket to allow loco body and chassis to be separated. This facilitates testing and simplifies maintenance, should it ever be required.
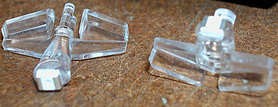
Several original Kato items had to be removed to clear space above the motor; a wiring bracket (replaced with the circuit board), a metal weight, incandescent light bulbs and plastic "light-pipes" for head and rear lights.

Most of the "light-pipe" was cut off so that only the actual headlight and rear light portions were retained. The end of what was left of the light pipe was polished smooth and LEDs were glued using epoxy cement.
I also added an LED (with 2.2K resistor) in the loco cab and wired it to BPS 12 volt output to indicate battery power on or off.
I also added an LED (with 2.2K resistor) in the loco cab and wired it to BPS 12 volt output to indicate battery power on or off.
Non-standard battery: Mechanically, this loco is well-engineered and has a Can motor requiring less than 500 mA full load. Because of space limitations, I used a smaller LiPo with 2 cells wired in parallel. This provides 900 mAh storage in a package measuring 2" long, 5/8" wide and 1/2" thick. Since, stiff battery leads were unworkable in the limited space, I substituted very flexible wire, eliminated the battery socket and soldered battery leads directly to the BPS.
Finally, here's a photo with the dynamic braking hood removed showing the opening I created to improve access to BPS and lighting connections.


