Radio Control and Battery Power for Model Railroads
  • Home
  • Radio Control
  • Battery Power
    • Batteries Explained
    • Battery Care
  • Quick Start
    • Getting Started
  • Price List
  • Documents
    • Hints, Comments, Notes
  • Contact Us
  • Neil's Blog

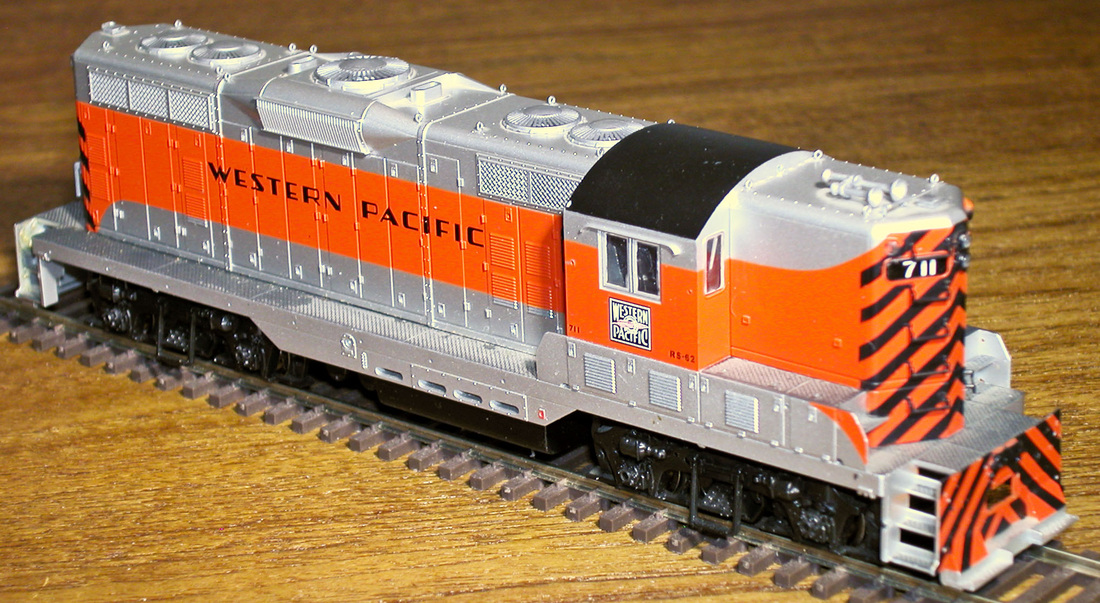
Life-Like Proto-2000 HO GP9

4/26/2014


The Challenge

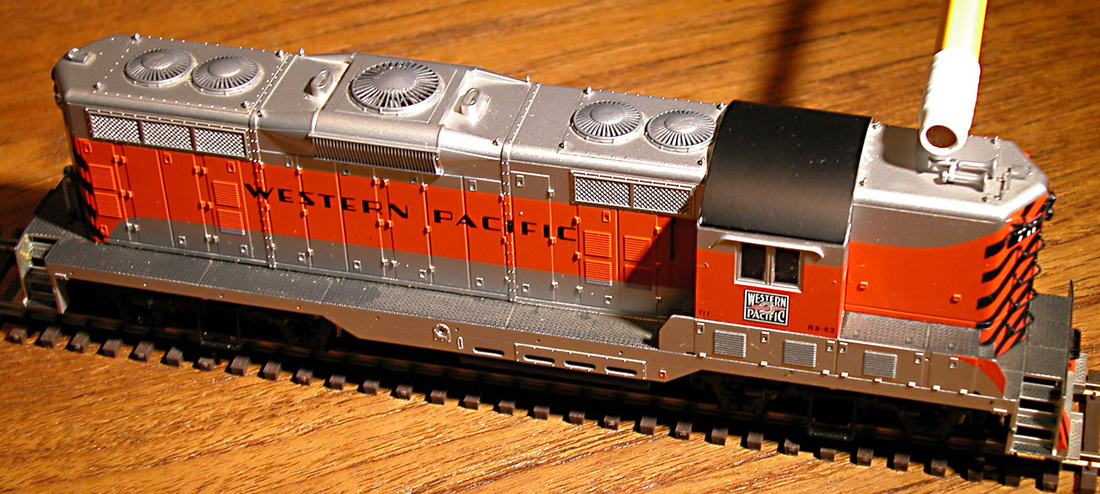
Narrow hood loco models with heavy metal castings are difficult candidates for battery power and radio control. This Life-Like Models GP9 is a classic example. It's assembly is simple; basically three sub-assemblies held together by a few screws. Remove couplers, undo 2 screws and the plastic shell lifts off in one piece. Undo 4 more screws and a large die-cast molding lifts off the chassis. This metal casting is designed to fill available space and maximize loco weight. Fortunately, it's robust and nothing is directly attached, so there is minimal risk to removing metal from top of the casting to create space flush against the roof of the engine hood. The objective is to remove a little metal as possible so as retain enough weight for reasonable traction. 
A non-sound decoder will be used for this installation, although a sound decoder could be used if more metal is removed to make space for a speaker. However, further reduction of weight is not desirable unless sound is a high priority.
Picture

The Chassis

This is all neat and tidy. No work is required except replacing motor and track power connections with more flexible wires that are less likely to fatigue and break as I struggle with reassembly.
Picture

Installation

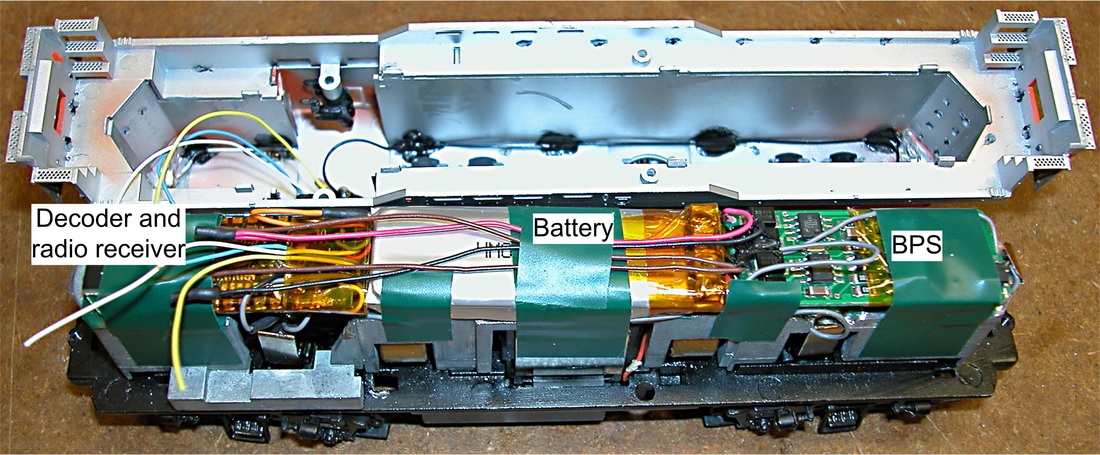
Carving (machining) a flat top surface on the metal casting creates space and provides a convenient mounting for battery power and radio control components. Electrical insulating tape is used between components and bare metal as well as holding everything in place. Since the metal casting is a snug fit in the body shell, there is no room for wires between the casting and sides of the body housing. The only space for wiring is between top of components and hood roof.
Picture
This photo shows arrangement of components with wiring complete except for front and rear lights (white, yellow and blue leads). LEDs with series resistors are already mounted in the body shell. With so much metal, I was concerned about radio reception and mounted the radio receiver with antenna at front of the loco above the driver's cab. The battery is above the motor and battery power supply at the rear of the loco. The narrow hood limits battery choice to 550 mAh storage, smaller than I would prefer, but probably adequate given the motor's low power consumption and the fact that most of the owner's layout is powered. The BPS has also been trimmed by removing wire stress relief holes and eliminating the battery plug and socket by wiring directly to BPS terminals.

Lights

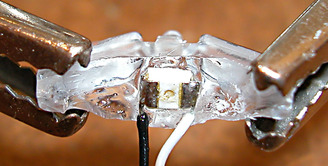
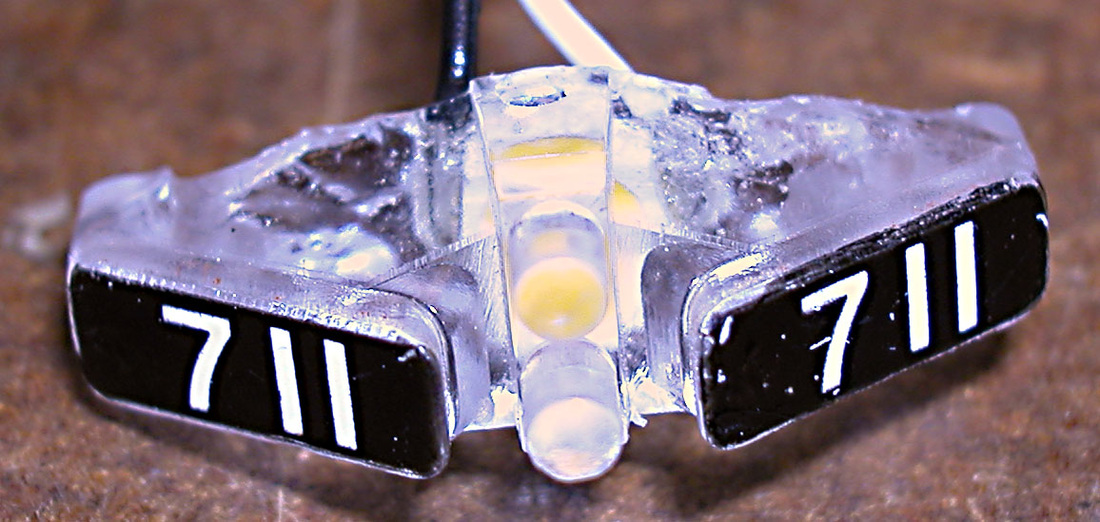
It has become common practice for manufacturers to use clear plastic light diffusers or light pipes for loco lights. To save space, I use a tiny surface mount LED glued directly to the diffuser or light pipe with clear epoxy cement. I also use warm white LEDs instead of the more readily available blue-white LEDs that are totally unrealistic representations of loco lights. With a 12 volt supply, I use a 4.7 K-ohm series resistor, which means the LED current is about 2 mA.
Picture
Picture

Battery On/Off Switching

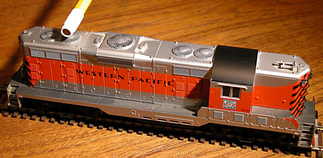
The battery turns on and stays on when track power is detected. A magnet (mounted on a pencil) and two magnetic sensors are used to manually turn battery power on and off. Since a sensor's activation range is about half an inch, (I aim for about 0.375" to make sure switching is reliable), it should be mounted as close as possible to top or side of the loco shell. The "on" sensor is already included on the BPS circuit board. I generally mount the "off" sensor on or near the radio receiver because the radio antenna is best located as far away from the motor as possible. This same precaution applies to the sensor because the motor's magnetic field will falsely activate the sensor.
Picture
Battery On
Picture
Battery Off

Using S-CAB with a Titan Decoder

4/9/2014


Objective

This  project began with a goal to investigate use of QSI's Titan decoder with S-CAB radio and battery power. It evolved into a project to install Titan decoders in S-scale brass locos using BPS battery power and controlled by S-CAB radio.
QSI's trademarks and intellectual property rights are acknowledged.
The purpose of this post is to publish some videos showing progress toward our objective. I say "our objective" because this has been a cooperative effort with an S-CAB user, whom I will call "Bill". It is work in progress and these videos, taken on my workbench using a cell phone, are not intended to be sophisticated little movies.

Background

Until now, a search of this S-CAB website for "Titan" (use the search box at top of the page) produces an obscure reference on the Price List page. It has remained obscure because there's not much demand for Titan. However, Bill has persisted with great patience and tenacity. It began mid-2011, when he noticed QSI was replacing their then-current sound decoder (Revolution) with a new product called "Titan". 
Bill purchased and sent Titan to me as soon QSI began delivery. By July, 2011, with some help from QSI, I converted Titan for use with S-CAB and battery power. This decoder is a very ambitious product; both in terms of functionality and technical complexity, which makes it difficult, both for me as I work on S-CAB radio control and battery power, but also for users trying to install the product. I thought it premature at this early date to publicize S-CAB compatibility. I had no experience installing or operating a loco with Titan. Bill was busy testing S-CAB (with Tsunami) and BPS power in one of his locos and did not follow up immediately with a Titan order.
However, an order for S-CAB with Titan did come through Northwest Short Line (NWSL) from a purchaser with computer programming experience. I mention this because this client dragged me reluctantly into providing S-CAB support for programming Titan CVs. With professional programming experience, he did not require me to get involved with actual programming of Titan CVs. Consequently, I was not well-prepared for the full scope of a Titan installation.
Fact is, Titan does not distinguish itself from the crowd until its CVs are well-tuned to the characteristics of a loco. In other words, making Titan compatible with S-CAB and installing it in a loco with radio control and battery power is only the first half of the challenge. Completing the battle requires diligent work programming CVs, a process that requires QSI's Quantum Programmer connected to a PC running their CV Manager software.
In theory, Titan can be programmed without a computer, but it's practically impossible without the capability to both read and write CV values. Without the ability to read a CV value, each change must be documented manually during a trail and error process to refine decoder behavior.
Eventually, Bill placed an order for Titan installation in his locos and we have been working on this for over a year. It has become a journey, and it goes on, with Bill testing locos on his layout and learning how to program CVs while I kept trying to debug Titan's strange behavior. I'm now cautiously optimistic that we have reached an important milestone of realistic loco operation. Bill has been generous with his support as well as periodic reminders to get on with it. I've produced material during this project to write several blog posts (and I might do that) but we need to refresh our motivation with a little show and tell. 
QSI's DCC Reference Manual, which documents Titan CVs, is 421 pages of difficult reference information. I now believe our difficulties with Titan were all associated with configuring the decoder; i.e. CV programming. Quantum Programmer assumes a Programming Track is used to read CV values, which an incorrect assumption when using battery power. With S-CAB and a device I call "RAPA", I eventually found a simple way to work around this problem.

Let's See Some Action

In each of  the following videos, Bill's loco is operating with BPS battery power. No power is connected to the rails. A Titan decoder is controlling the loco in response to operator commands transmitted by radio directly from the S-CAB throttle to a radio receiver in the loco. All loco system components, including BPS and battery, are installed in the tender. An S-CAB throttle is the only other device used in these videos (excluding my cell phone).
Above     Demo 2.  Whistle
Here, I sound the whistle and, if you listen carefully, you'll hear brakes applied at the end of run.
Above    Demo 4.  Braking
Here, a newbie engineer backs up too fast, misjudges end of track and is hard on the brakes.
Left     Demo 1.  Speed Control
This video shows decoder control of acceleration and deceleration. I use the throttle only twice. First, I move the throttle to full speed to begin the run. Since I have only 6 feet of track to work with, the loco does not reach full speed before I move the throttle to zero so that the loco can slow normally and safely stop without additional braking. After a little practice, sure enough, the loco stops before reaching end of track without further throttle action. In a later video demo 4), I'll demonstrate more aggressive braking action. 
Above     Demo 3.  Bell
We're running backwards with bell ringing. Aside from sounds, this video captures how realistically the loco comes to a stop, controlled by the decoder. I turn of the bell as the loco comes to rest. Finally, I use a magnetic wand (actually a magnet on a pencil) to turn off battery power and end the operating session.
Since S-CAB uses only 28 speed steps, I could not control a stop this precisely if Bill had not set realistic values for momentum. I'm only using the throttle to send a speed command. The decoder's configuration variables (CVs 3 and 4) determine how the loco responds and Bill's efforts have produced a good representation of prototype locomotive performance.

End of demo videos

Conclusion

This experience has me thinking about decoders and loco control from a new perspective. As a loco operator, all I can do is use available controls so that the loco does what I want, within the constraints of its design. I can't command a steam loco to perform like a sports car. A decoder should be configured to reproduce physical constraints of the loco model's full size prototype. It's not important whether the throttle uses 28 or 128 speed steps. I can whip the throttle to full speed with a flick of the thumb and the loco simply accelerates at a maximum rate allowed by the decoder. If I whip the throttle back to zero, the loco slows with prototypical realism if CV4 has been set appropriately. An elegant feature of Titan is it's capability to operate braking separately from throttle control. Just quickly move throttle to zero and use a function button to manage brakes. This capability is not unique among sound decoders, but braking sound effects are handled quite convincingly by Titan.
I acknowledge that many layouts are not big enough to operate steam locos operating in prototypical fashion, but keep in mind these videos show an S scale loco operating on six feet of track.
This is not journey's end, but I'm now convinced that Bill's persistence has been justified.

    Author

    I'm a retired electrical engineer, but still spending more time on engineering than on my layout. These days, it's mostly about applying radio control and battery power on smaller scale layouts (HO, On3, On30)

    Categories

    All
    Historical
    Installation Notes
    Loco Projects
    Operation

    The photo above is not my layout. It's a great view of Seattle's King Street station by Ross Fotheringham.

    Archives

    February 2019
    October 2018
    September 2017
    August 2016
    April 2016
    January 2015
    November 2014
    May 2014
    April 2014
    February 2014
    November 2013
    October 2013
    September 2013
    August 2013
    July 2013
    June 2013

    S-CAB Conversions:
    S-scale NW2 Switcher
    On30 D&RG 4-4-0
    HO-scale GP9
    HO-scale GP35
    HO brass 4-8-4
    HO Bachmann 2-6-2

    S-scale EMD F-40PH
    HO-scale ALCO DL-109
    On30 Forney
    HO-scale Atlas-Kato GP-7


Proudly powered by Weebly